iTunes is a popular app for people to find and download various media resources. Many movie lovers would like to save iTunes movies to their iPads or PCs for watching them in a convenient way. However, the storage space of these devices is too small to keep the abundant movies.
For instance, an iPad with 64 GB storage can only store 2 or 3 HD movies, which is far from enough for a movie lover to watch. Therefore, saving iTunes movies to an external hard drive will be a great option for movie lovers. It is one of the best ways for them to save a lot of movies.
With a mobile hard drive, you can save movies as many as you want. And when you want to watch these movies, you can transfer them to your iPad or other devices to enjoy them expediently. If you want to know how to make it come true, you must read this article carefully. Here we will show you how to save iTunes movies to an external hard drive. Follow the instructions below, you will find it is easy to put large numbers of movies to the hard drive.
Method 1. Directly Change iTunes Movie Download Location
The first method is an easy one. If you have an iPad that has iTunes installed, you could just change the storage location of your iPad and set up an external hard drive as your first storage option. Here are the steps for you:
Step 1. Insert an external hard drive into your iPad or any Apple product with iTunes on it.
Step 2. Open iTunes, and find “Advanced” from the “Preference” button. Click the options “Keep iTunes Media Folder organized” and “Copy files to iTunes Media Folder when adding to library”, and then click “Change”.

Step 3. From the “Change” window, choose your targeted external hard drive, and then click “OK”.
Step 4. Open the “Files” option, go to “Library” > Organize Library, and choose to Consolidate FilesOK to finish the setting
Now you have changed your storage space to an external hard drive. Though this method is quick and easy, it may cause the problem that the downloaded movies fail to play on another Apple device.
Furthermore, all iTunes movies can only be played on Apple products. It is impossible to play these movies on PCs of Windows system or Android devices. Even when you want to play movies on Apple devices, you need to transfer them to the devices again. And if you rented movies from iTunes, you would be required to watch them within 24 hours. These limitations are all making movie watching full of obstacles.
So, is there a better way to store iTunes movies on an external hard drive, and watch them without limitations? Of course. A tool named TuneFab M4V Converter will help you to save movies in a compatible format that matches various devices, lets you get rid of time limits by converting iTunes movies to MP4, and allows you to play your iTunes movies in a flexible way.
Method 2. Back Up iTunes Movies to Your Hard Drive for Flexible Playback
The reason why iTunes movies are incompatible on any device but Apple products is that these movies are protected by DRM (Data Rights Management). But TuneFab M4V Converter is able to remove DRM from iTunes media files, convert them to MP4, and enable you to play them flexibly.
Besides that, TuneFab M4V Converter offers many remarkable features:
● Converts iTunes M4V to high-quality MP4, making it compatible to be played back on different devices
● Supports batch conversion
● Keeps Dolby 5.1 soundtracks, subtitles, and hidden subtitles, as well as supporting customized soundtracks and subtitles
● Saves ID3 data for organizing your movies in a better way
● Convert your movies at 5x speed
● Provides user-friendly operation interface
Having such a powerful tool will make your movie-watching experience more delightful. Now you can download TuneFab M4V Converter on your device, and follow the steps below to convert your movies.
Step 1. Download the latest version TuneFab M4V Converter
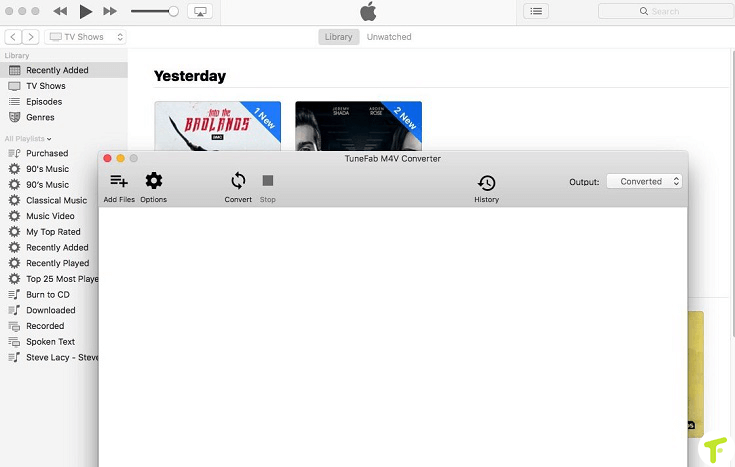
Download the latest version of TuneFab M4V Converter on your iPad or MAC. And then open it to see the interface below.

Step 2. Drag iTunes Movies into the Converter
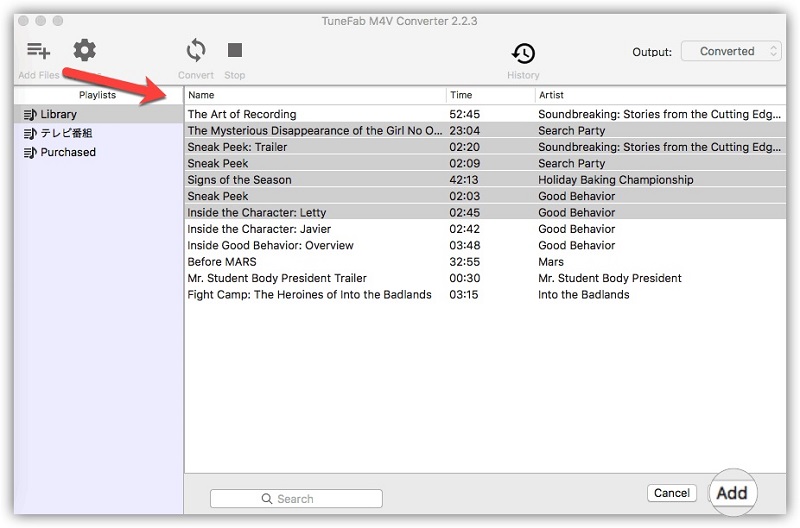
Click “Add Files” and open your iTunes movies folder. Choose the movies you want to convert and click “Add” to add them into the converting list.

Step 3. Customize Subtitles and Audio Tracks
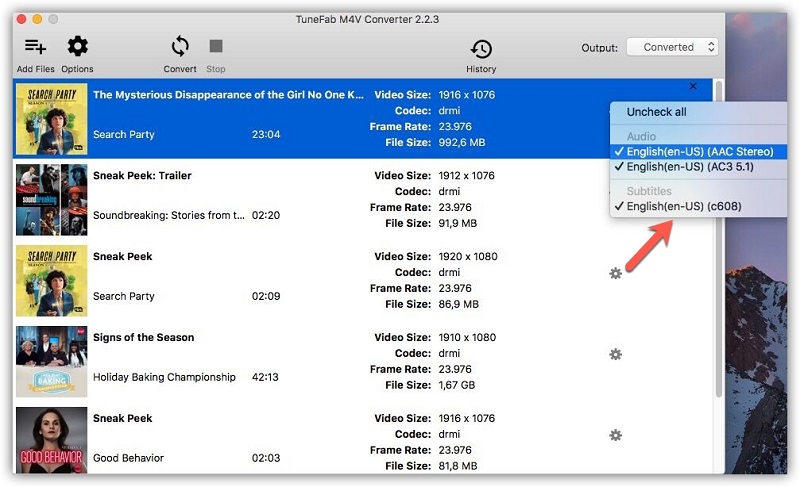
At the right side of your selected files, there is a gear icon, you can set the subtitles and audio tracks you prefer by moving your cursor to is.

Step 4. Start Conversion
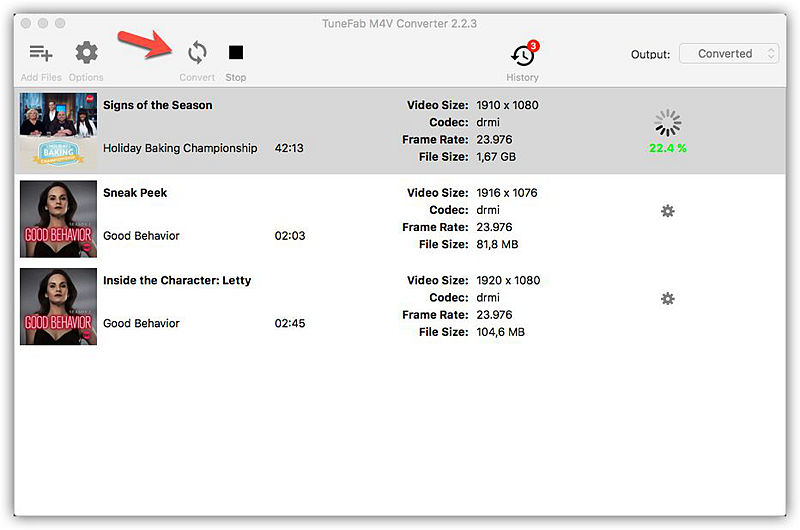
After setting all your requirements, click “Convert” to start the conversion. Since the tool supports butch conversion, you can convert all the iTunes movies altogether at an extremely fast 5x speed.

Few minutes later, all the M4V movies will be converted to MP4. You can playback these MP4 movies on various devices without time limits. If you want to save more iTunes movies in a compatible format, just repeat the above steps to make it happen.
More Topics:
Take A Quick Tip: How to Rent Movie on iTunes
How to Play iTunes Movies on Xbox One
How to Play iTunes Purchased/Rented Movies on Nook Tablet
Conclusion
TuneFab M4V Converter is a perfect tool to help you to save iTunes movies to an external hard drive. Because it converts the limited M4A files to MP4 files that can be played on any device. You will be away from all limits set by Apple, and enjoy your movies carefree.


