Apple Music boasts stunning music quality and a massive library. Therefore, you may come up with an idea to download and keep songs from Apple Music as a backup. These high-quality tracks usually have a large file size, which takes up a lot of storage space on your phone. Thus, transferring Apple Music to SD card might be a solution. But you may find the songs unplayable and can not be recognized by the media player.
No worries. This article provides solutions to remove the obstacles. You can figure out how to transfer Apple Music to SD card and make the downloaded tracks playable on more devices. Also, we will introduce a quick trick to help you get high-quality Apple Music while keeping the files small for saving locally and therefore free up more storage on your phone.
You May Like:
Part 1. How to Save Apple Music to SD Card (For Android Users)
Quick question: Can you save Apple Music to SD card?
A short answer to this question is Yes.
Over the years, Apple has been working to build its media empire. Apple Music is the epitome. Unlike Apple’s other lines of business, Apple Music is not only compatible with Apple’s product, but also available on Android-powered devices. This helps Apple gain new subscribers and increase its user base.
But dating back to the very beginning, the Android version only allows users to download songs to internal storage space. It was not until 2016 that Apple added support for Android users to download music to SD card.
As long as you are using Android devices with a microSD card slot, you can put all downloaded tracks to an SD card and free up much space on your device’s internal storage.
The following are the steps for changing Apple Music’s settings on Android so that you can save Apple Music on an SD card.
Step 1. Launch the Apple Music Android app. Make sure you have updated the app to the latest version.
Step 2. Go to Menu > Settings > Download Location.
Step 3. Select SD Card from the list.
Step 4. Click "Yes" to confirm to transfer the currently downloaded Apple Music tracks to SD Card.

This improvement made on Apple Music on Android can be considered a great breakthrough. In other words, it is possible for Android users to save tracks on an SD card to free up space.
Note:
Perhaps you may find the Apple Music songs are still unplayable after you put them on an SD card. No worry, jump to the next part and we'll reveal the secret.
Part 2. Transfer Apple Music from PC to External SD Card (All Users)
But as we've mentioned above, the downloaded Apple Music may not be recognizable if you put them out of Apple Music-compatible devices. This is because the downloaded Apple Music is still formatted in M4P, a protected audio format attached to Apple's FairPlay DRM.
That is to say, you are only allowed to play downloaded Apple Music songs with Apple's authorized devices. And these files are accessible only when your Apple Music membership is valid. If you want to play them on a non-Apple device via an external SD card, you need to remove DRM first and convert Apple Music tracks to MP3.
You may try third-party tools such as TuneFab Apple Music Converter, an easy-to-handle program for converting protected Apple Music files.
Main Features of TuneFab Apple Music Converter
● Convert Apple Music songs/albums/playlists/podcasts to DRM-free MP3, M4A, FLAC, and WAV.
● Customize the bitrate (up to 320 kbps) and the sample rate (up to 48 kHz) to amplify the listening
experience.
● Batch download Apple Music tracks at 20X faster speed.
● Retain metadata information (i.e. Artist, Album Name, Track Number, Cover Art) for efficient management.
Embedded with Apple Music web player, you can easily complete the conversion task within one app. Let's see how to save DRM-free Apple Music to SD Card with TuneFab.
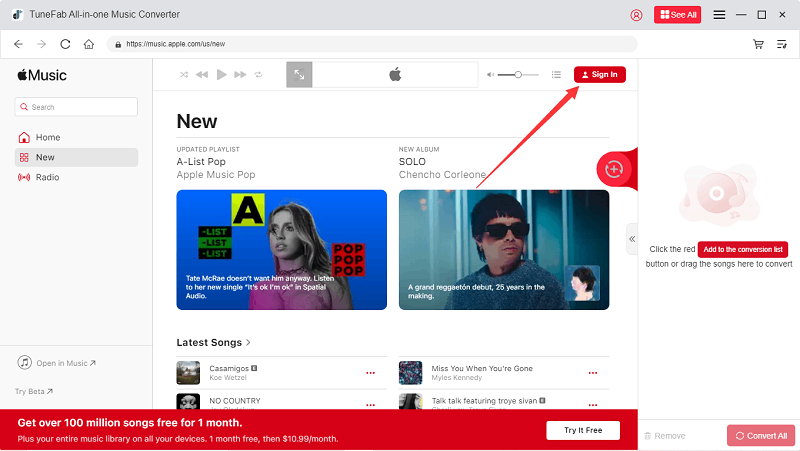
Step 1. Log into Apple Music Account
Download, install, and launch TuneFab Apple Music Converter. Once enter the web player, click "sign in" at the top right to log into your Apple Music account.
Step 2. Add Apple Music to The Conversion List
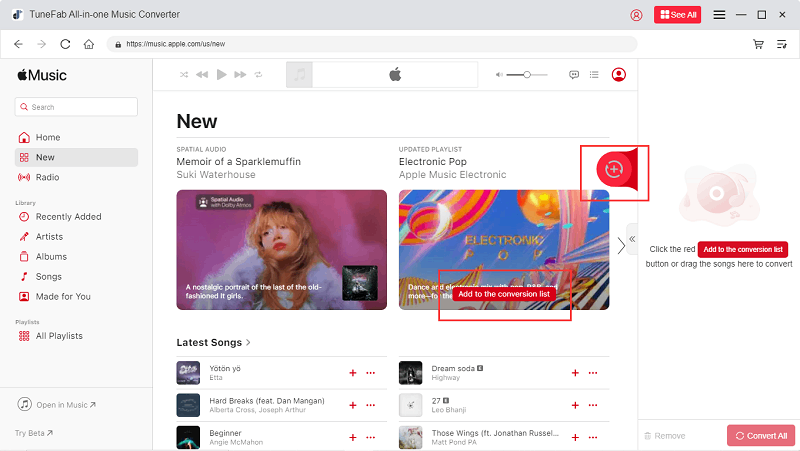
Navigate to your wanted Apple Music song/album/playlist. Simply click on the "Add to the conversion list" button to add it to the queue. Alternatively, you can drag and drop it to the queue.
Step 3. Customize Output Settings
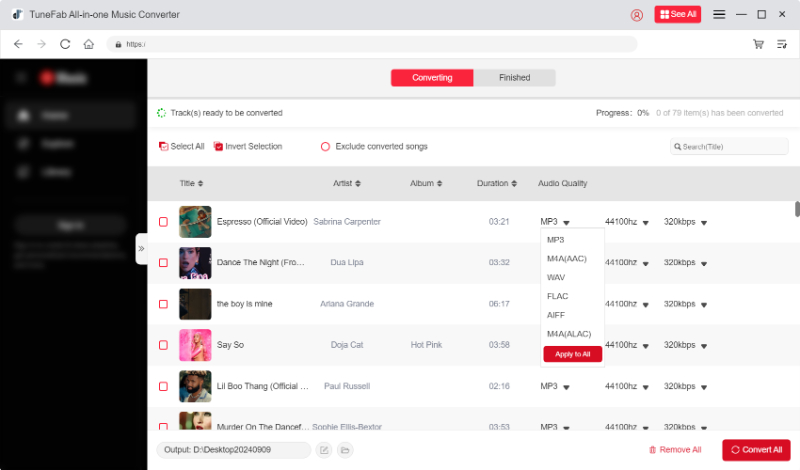
In the conversion queue, you can tweak the output settings for Apple Music songs, such as output format, bitrate, and sample rate.
Tip:
If you want to change the default parameters for all tracks, go to Menu > Preferences. You can also change the output folder and output file name.
Step 4. Complete Conversion Process
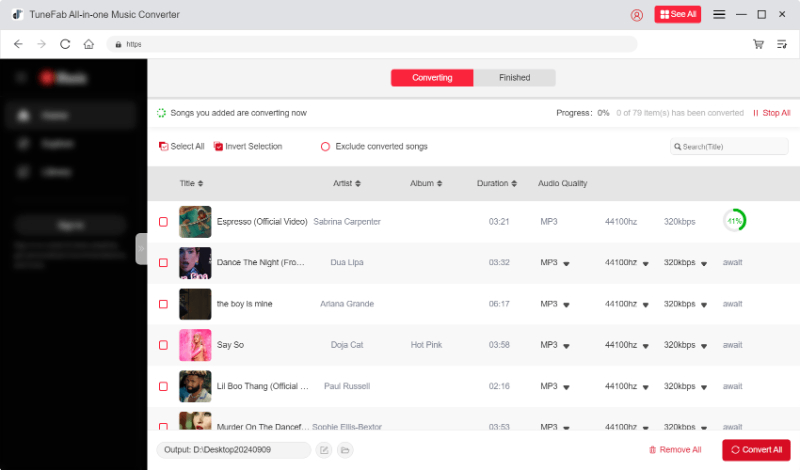
Once you complete the settings, click "Convert All" to initiate conversion. When finished, go to the "Finished" section to access the downloaded DRM-free Apple Music tracks.
Step 5. Transfer Downloaded Apple Music to an SD Card.
Now, you are ready to transfer Apple Music to an SD card. Simply insert your SD card into an SD card reader, and connect the SD card to your computer. Then transfer all the downloaded Apple Music files in the output folder to your SD card.
Part 3. Move iTunes Songs to SD Card (For All Users)
If you have purchased songs from the iTunes Store before 2009, the iTunes song files are also encoded in M4P format, which is DRM-protected. This fact makes the songs unplayable even though you can transfer them to an SD card. To get rid of this trouble, utilizing third-party tools, like TuneFab iTunes Music Converter, can be a solution.
TuneFab iTunes Music Converter is crafted to convert iTunes songs, audiobooks, and even music videos in your iTunes library to DRM-free MP3, M4A, FLAC, AAC, and more. You can also change the output parameters to your preferences to preserve the best quality of your media resources. The metadata information can be preserved automatically so that you can easily organize your massive music collection.
Main Features of TuneFab iTunes Music Converter
● Multiple Output Formats for Selection: Rip audio from protected Apple Music format
and then convert to popular yet unprotected formats such as MP3, M4A, AAC, etc. Some unique formats are
also provided, including AC3, AU, and AIFF.
● Customizable Parameters: You can change the bitrate (up to 320 kbps) and the sample
rate (up to 48 kHz) to preserve different levels of music quality.
● Keep and Edit ID3 Tags: ID3 tags are important for managing your converted tracks. As
long as you save the music, song information such as title, album, artist, genre, album cover, and so on
can be completely preserved.
● Fast Speed with Original Quality Maintained: The time for converting a 3-minute song
can be shortened within a few seconds. Audio quality can be kept as the original track after conversion
as long as you set up the suitable output settings.
Here is the guide on how to download iTunes songs as DRM-free songs and transfer them to an SD card.
Step 1. Add iTunes Song Files to iTunes Library
Add iTunes Song files to the iTunes library and make sure the songs are playable in iTunes.
Step 2. Run TuneFab iTunes Music Converter
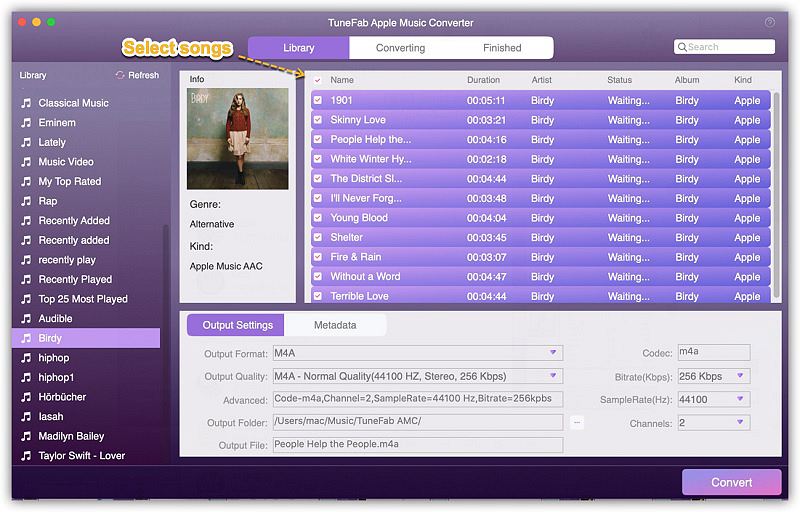
Launch TuneFab iTunes Music Converter on your computer. When the main interface shows up, you can select the songs you want to download from the "Playlists" panel.
Step 3. Choose Output Format
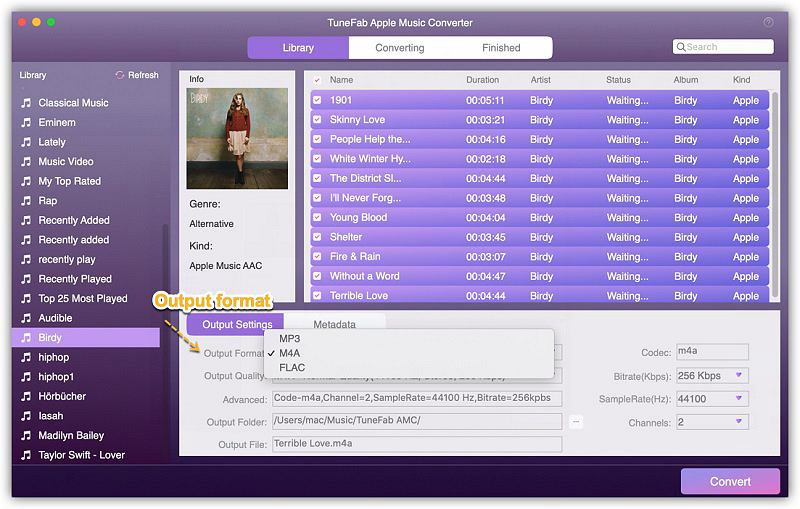
Choose the output format and set a personalized output folder to save the converted file. Still, you can adjust the output settings to M4A with a sampling rate of 44.1 kHz and a bitrate of 256 Kbps, which can ensure good sound quality and a pleasant playback experience.
But if storage space and compatibility are your priorities, stick to MP3 format and also set the sample rates as 44.1 kHz.
For users who have streaming habits of high-quality music, the output format can be tweaked as AAC, with a sampling rate of 44.1 kHz, and a bitrate of 256 Kbps. The output file of a 3-minute song can reach to 6 MB approximately.
Step 4. Start Converting
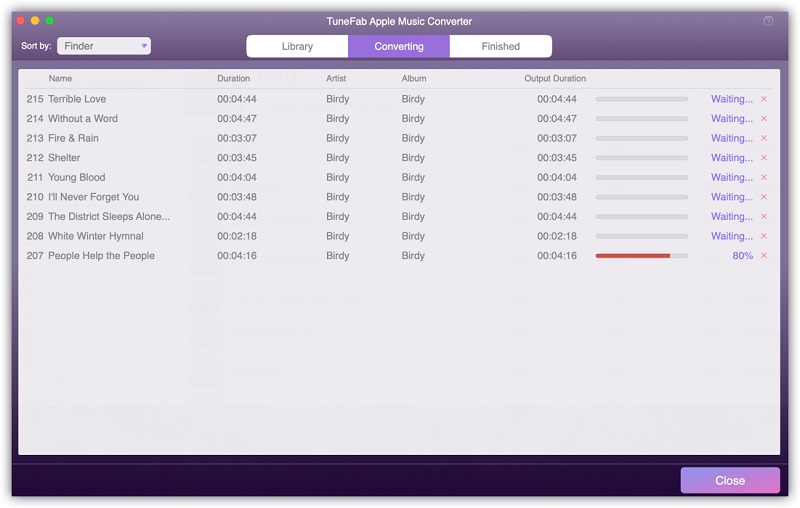
Click "Convert" to start converting iTunes songs.
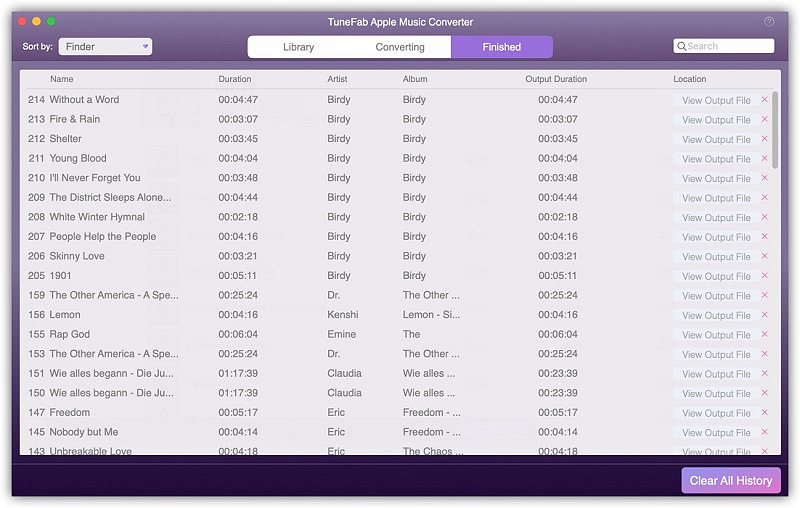
When the conversion is done, go to "Finished" > "View Output File" to find all songs at the output destination
Step 5. Prepare the SD Card
Now you take out the music to the SD card and insert the storage card into an SD card reader.
Step 6. Connect the SD Card Reader to the USB Port
Connect the SD card reader to the PC or laptop's USB port. Now select all converted Apple Music files in the output folder, then transfer them to your SD card. With these MP3 files, you can enjoy playback everywhere.
Conclusion
If you want to store Apple Music songs in your external SD card for offline playback, you can choose one of the above methods depending on what device you use to listen to music.
If you use an Android device, then you can directly download Apple Music to an SD card. If not, you can convert Apple Music songs to DRM-free formats like MP3 on your computer, and then transfer them from PC to your external SD card.


